4.6. Warm-up
Exchanging a sample at the conclusion of an experiment can be risky if done too quickly. Exposing a cryogenic chamber to the outside environment while components are still cold can result in those components attracting frost and requiring extra steps to prepare the system to cool down again. Warm-up mode simplifies this process by turning on all heaters in a single step and notifying the user when the system is likely in a safe state to expose internal components to outside atmosphere.
The Model 346 allows heaters 1 to 4 and groups 9 and 10 to be used together to deliver up to 400 W into the system for Warm-up mode. Outputs used for Warm-up mode must be configured in either Closed loop or Zone mode, and must be paired with a temperature input to form a control loop. If a heater mode is set to Off or Open-loop, and Warm-up mode is initiated, those heaters will be forced to Closed-loop mode in order to execute the Warm-up.
Setup
To use Warm-up mode, tap the Warm-up tab under the Home view on the front panel. The following screen will appear.
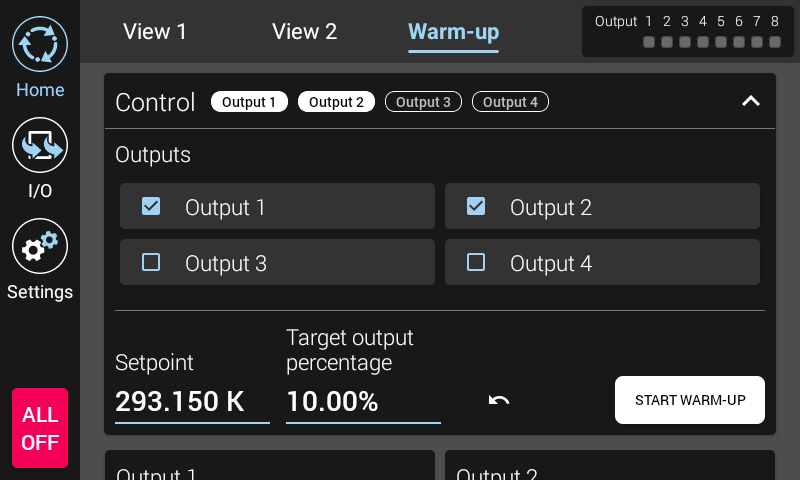
Figure 4.10 Warm-up screen
Expand the Control view to see the heater outputs that are available for Warm-up mode. Tap each output that you wish to use for Warm-up mode. Once the outputs are selected, enter a desired Setpoint and Target output percentage. Setpoints ranging from 275 K to 325 K can be entered.
Due to varying thermal masses and thermal lag within systems, there may be cases where the input reading prematurely reports that a stage has reached the setpoint temperature. To address this phenomenon, the output power delivered to the heater by the Model 346 can be used as an indicator of whether the stage has fully warmed up. The reason is that as sections of the system continue to warm, a large output is required to keep the sensor at a stable temperature. When this additional cooling is finally overcome, the output will drop, indicating that the system can be considered warm.
The Target output percentage setting is used in conjunction with the Setpoint temperature to determine if the system has truly warmed up. The default for this value is 10%. For the Model 346 to report the system is warm, the Setpoint temperature must be achieved for all inputs, and all outputs must go below the target output percentage.
Note
It is recommended to set the setpoint slightly colder than room temperature so that minimal output is required to keep the system at temperature.
Note
Any change to the output control mode or Setpoint for a given output will cause that output to drop out of “Warming” state.
Use
Once the outputs are selected, and the Setpoint and Target output percentage values are entered, tap the START WARM-UP button to begin the warm-up process. Each output is set to the HIGH range, and Closed loop control takes over, likely setting each output percentage to 100%. During this time, a “Warming” indicator will appear next to each output. The following image shows outputs in a warming state.
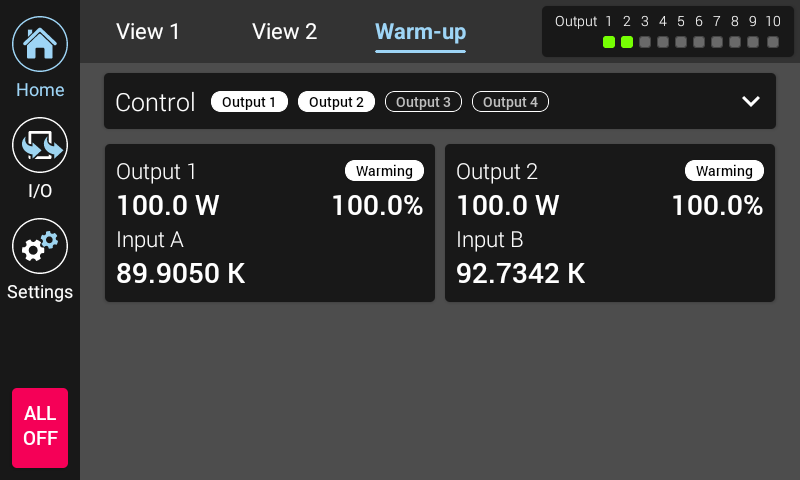
Figure 4.11 Warm-up warming state example
As each control loop reaches the Warm state, a green checkbox appears in that output’s card to indicate it has reached the Warm state. Once every output selected for Warm-up mode has reached the Warm state, a message will appear indicating the system is warmed up.
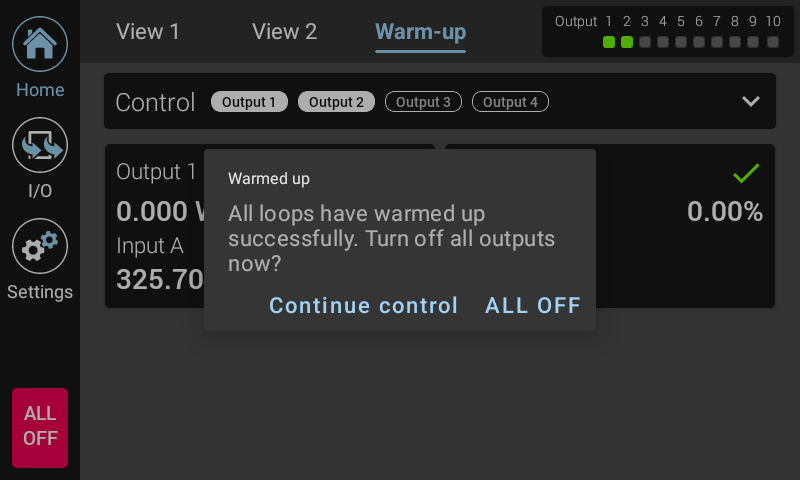
Figure 4.12 Warm-up warm state example
Tapping Continue control will cause the Model 346 to continue to actively control the system. Tapping ALL OFF will cause the Model 346 to stop actively controlling the system, and the outputs will be turned off.
Interface Commands: WARM, OUTMODE, OUTOPR?